This guide explains how to enable and manage Customer Community users and how end users can log in and use the community portal to create and manage support cases.
Guide For Administrators
Enable a Customer Community User
1. Locate or create the contact under the appropriate Account.
2. Ensure the contact has a valid email address configured.
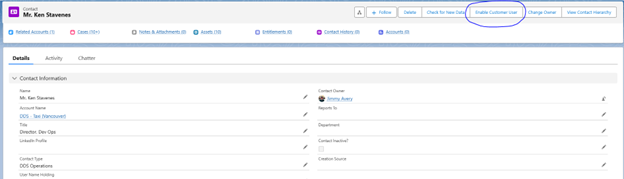
3. Open the contact record.
4. On the contact profile page, click Enable Customer User.
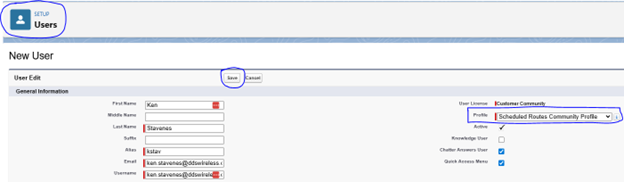
5. You will be redirected to the User Setup page.
6. From the Profile dropdown menu, select the appropriate community profile (for example, Scheduled Routes Community Profile).
○ The selected profile determines what the customer can access in the community.
7. Click Save.
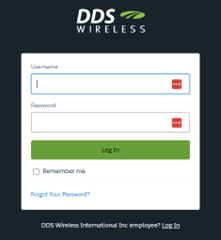
Once enabled, the contact will receive an email with a link to set up their password and log in to the community portal. Users can then create and manage support cases and access other available content.
Reset or Deactivate a Community User
1. Locate and open the contact record.
2. Click View Customer User (visible only if the contact is already enabled as a community user).
To reset the password:
• Click Reset Password.
• Confirm the action when prompted.
• A password reset email will be sent to the contact.
○ These credentials are created when you set up your account using welcome email.
Home Page
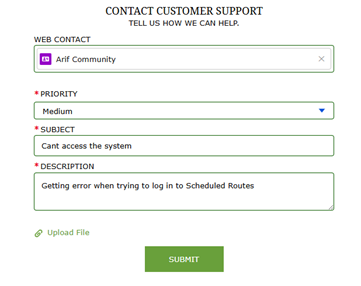
After logging in, you will be directed to the Home page. The Home page includes a New Case form so you can quickly report an issue.
To create a case:
1. Complete the required fields.
2. Add attachments if necessary.
3. Click Submit.
This action will:
○ Create a case in Salesforce
○ Assign it to the appropriate case queue
○ Notify the support team by email
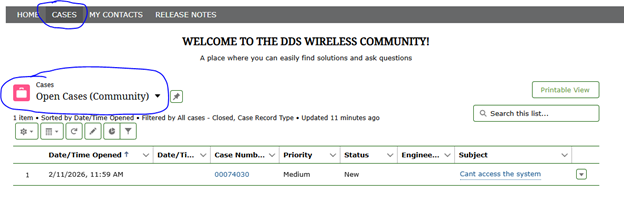
Viewing Cases 1. Navigate to the Cases tab. 2. Use filters to view relevant cases associated with your account. 3. Select a case to view detailed information, including status and communication history.
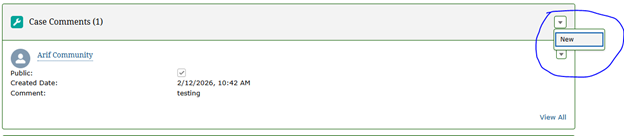
Comments and Emails To interact with an existing case: 1. Open the case details page. 2. Scroll to the Case Comments section to read or add comments. 3. Use the Email section to view or manage case-related emails.
Closing a Case To close a case:
1. Click the Close Case button at the bottom of the Case Details page. 2. Be sure to add details when closing a case. Details can be added in the Case Info section.